
















 ● 20 min read
Showdown: RS550 12V DC 8000 vs RS-555 12V DC 6000 RPM DC Motor
Vol. 56 | The Heavyweight DC Drivetrain Duel Reliability isn’t optional when you’re designing actuators that need to move actual steel or
Read Article →
| Bulk Pricing | ||
|---|---|---|
| QTY | Unit Price(Inlc. GST) | |
| 10+ | ₹2,562.70 ₹ 2171.78 + 390.92 GST | |
| 20+ | ₹2,536.55 ₹ 2149.62 + 386.93 GST | |
| 30+ | ₹2,510.40 ₹ 2127.46 + 382.94 GST | |
| 50+ | ₹2,458.10 ₹ 2083.14 + 374.97 GST | |
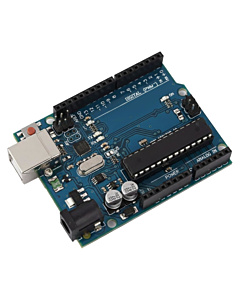
Start your electronics journey with the official Arduino Uno R3! Featuring the ATmega328P MCU, 5V logic, 14 digital I/O pins, 6 analog inputs, and a rugged DIP chip socket, it is the perfect board for learning and prototyping.
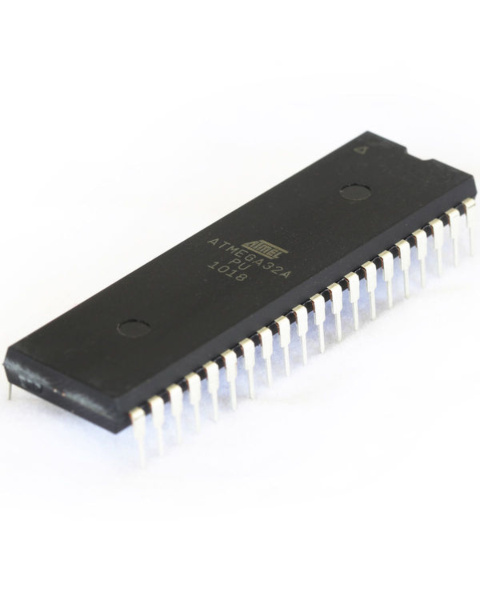
The Classic, Unbreakable Standard The Arduino Uno R3 is the board that launched the maker movement. At its heart is the venerable ATmega328P 8-bit microcontroller. In this classic R3 design, the microcontroller is a large, through-hole DIP (Dual In-line Package) chip seated in a socket. This makes the board incredibly resilient for beginners; if you accidentally fry the chip with a short circuit, you can simply pull it out of the socket and push in a replacement chip for a few dollars, saving the entire board!
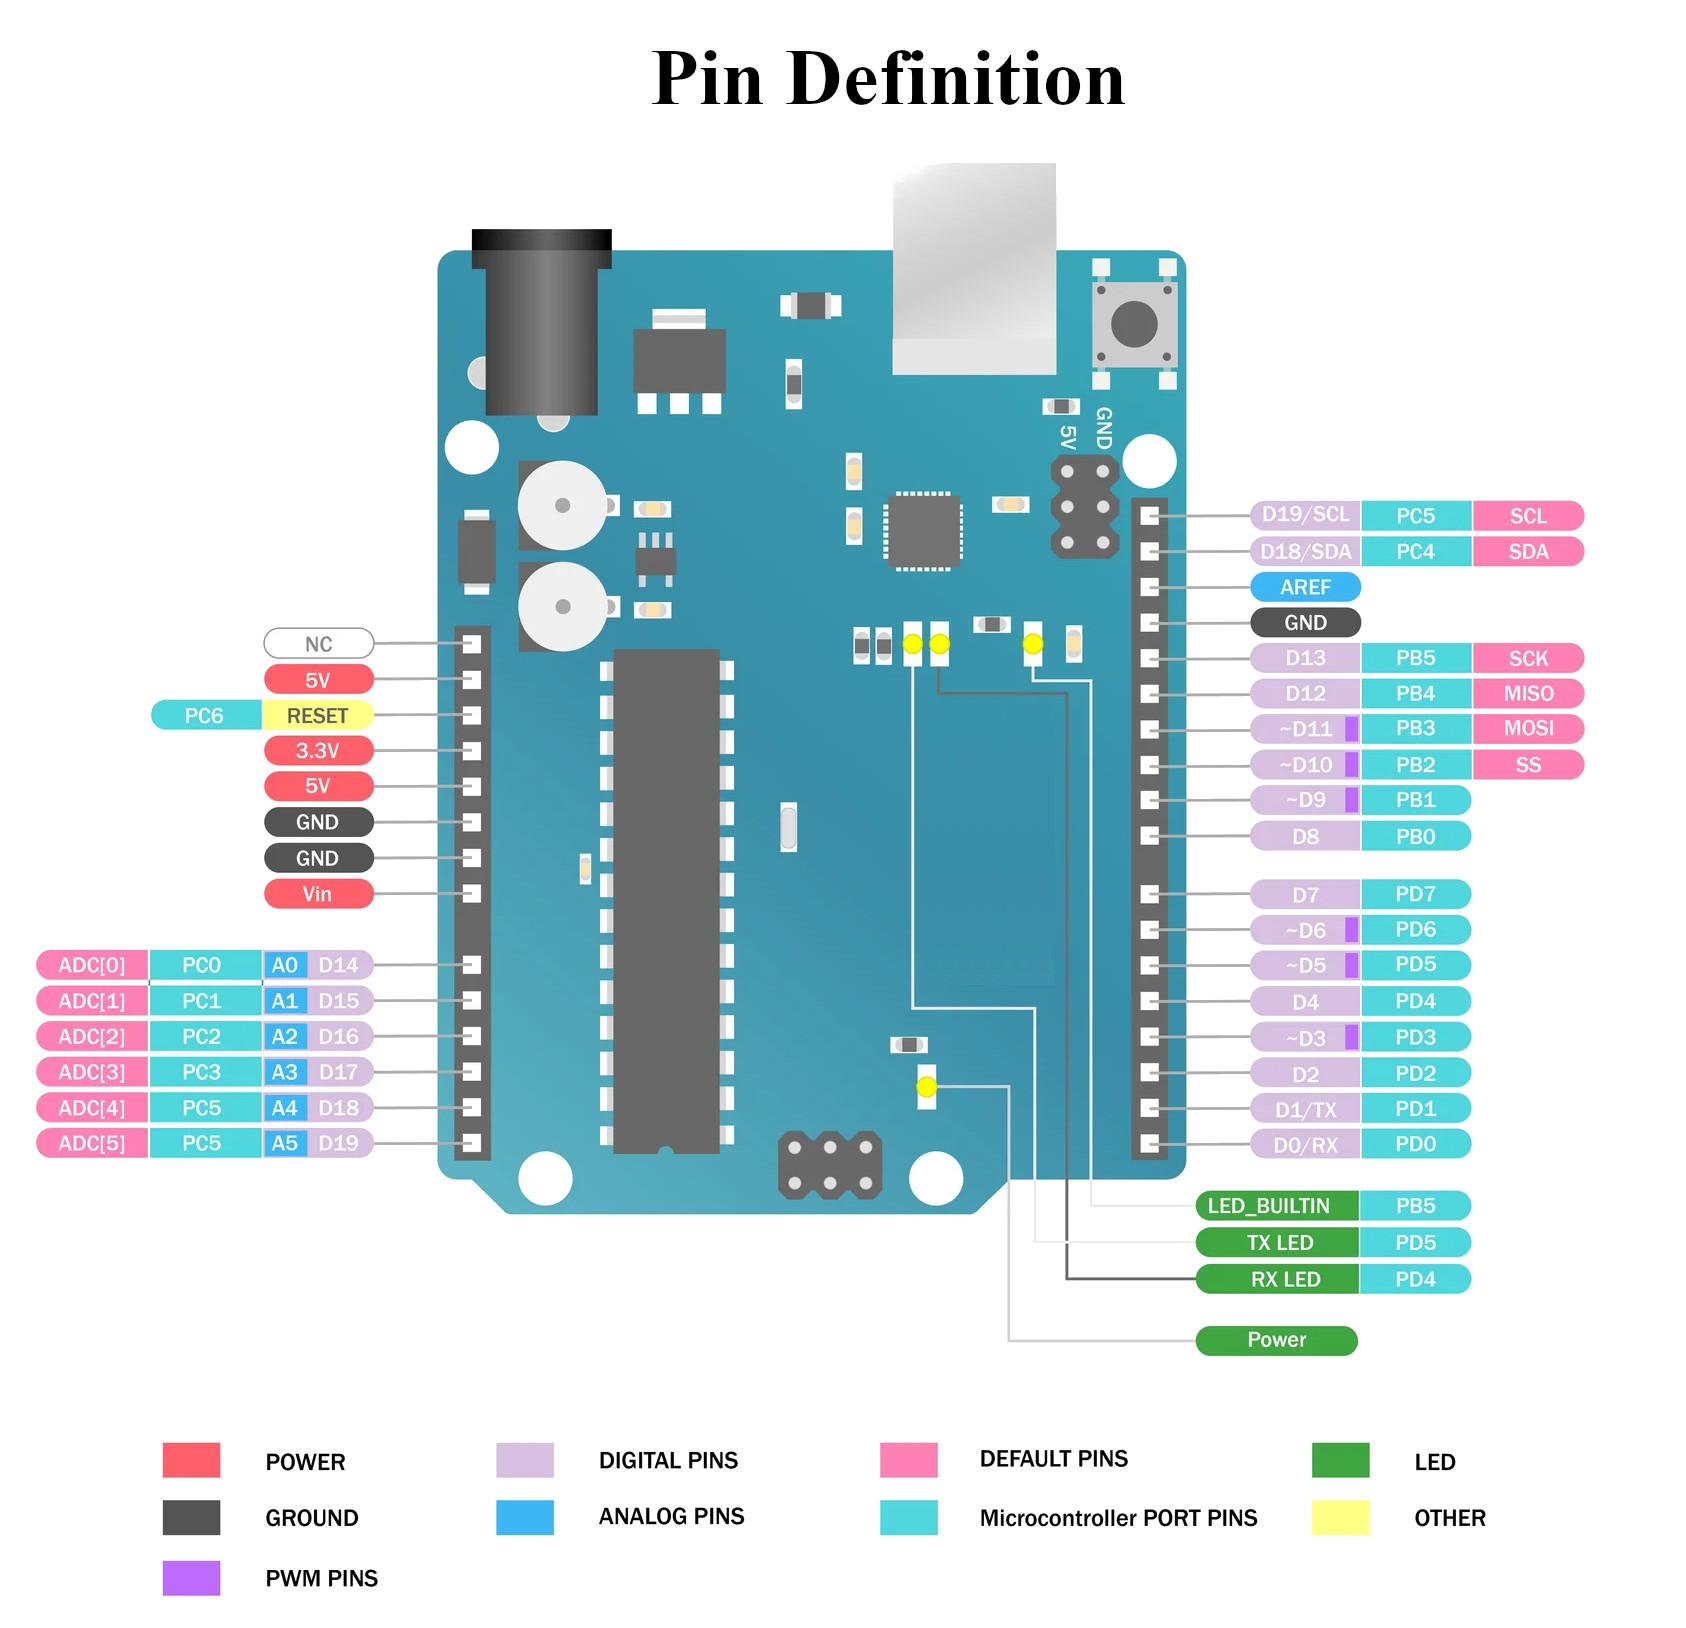
Rich I/O and Universal Compatibility The Uno R3 defines the standard "Arduino Shield" footprint that thousands of expansion boards use today. It breaks out 14 digital input/output pins (D0-D13). Among these, 6 pins support PWM (Pulse Width Modulation) for dimming LEDs or controlling motor speeds. Additionally, it features 6 dedicated analog input pins (A0-A5) for reading potentiometers, light sensors, and temperature probes. The board also includes dedicated hardware pins for SPI, I2C (SDA/SCL), and UART (TX/RX) communication protocols.
Authentic Italian Engineering This is not a cheap clone. This board is officially designed and assembled in Italy. It arrives in the iconic Arduino cardboard packaging and includes a custom-molded clear plastic sled/base that protects your desk from scratches and prevents the bottom solder joints from shorting out on metal surfaces. Power delivery is robust, allowing you to power the board either via the sturdy USB Type-B connector or a 7-12V wall adapter plugged into the onboard DC barrel jack.
Specifications
Microcontroller: ATmega328P (DIP Package)
Operating Voltage: 5V
Digital I/O Pins: 14 (D0-D13)
Analog Input Pins: 6 (A0-A5)
Built-in LED: Pin 13 (PB5)
Power Connectors: USB Type-B, DC Barrel Jack
Origin: Designed and Assembled in Italy
Key Applications and Projects
Educational Kits: The standard board for learning C++ programming and basic electronics in classrooms worldwide.
Prototyping Platform: Rapidly testing sensors, servos, and displays on a breadboard before designing a custom PCB.
Home Automation Elements: Reading DHT11 temperature sensors and controlling 5V relay modules to automate desk fans or lighting.
Unlock New Capabilities (Project Evolution) The Ultimate Desktop Weather Station: Start by learning how to blink the onboard LED. Once mastered, evolve your Uno R3 project! Connect a low-cost I2C OLED display to the SDA and SCL pins, and wire a BME280 environmental sensor to the same bus. Add a 9V power supply to the DC barrel jack to make it completely standalone. Within an afternoon, you've transformed a raw circuit board into a permanent, highly accurate desktop weather station displaying real-time temperature, humidity, and barometric pressure!
1 x Official Arduino Uno R3 Board
1 x Clear Plastic Protective Base
1 x Official Arduino Packaging Box
1. What microcontroller does this board use? It uses the ATmega328P microcontroller.
2. Is the microcontroller chip removable? Yes, this classic R3 version uses a DIP (Dual In-line Package) chip seated in a socket, allowing it to be easily removed and replaced if damaged.
3. What is the operating logic voltage? The board operates on 5V logic.
4. How do I connect it to my computer? You need a standard USB Type-B cable to plug into the silver USB port on the board.
5. How can I power the board without a computer? You can plug a 7V to 12V DC power adapter into the black DC barrel jack, or supply voltage directly to the Vin and GND pins.
6. How many digital pins does it have? There are 14 digital input/output pins, labeled D0 through D13.
7. Which pins support PWM (dimming/analog output)? Specific digital pins support PWM output, commonly denoted by a tilde (~) symbol next to the numbers.
8. How many analog input pins are there? There are 6 analog input pins, labeled A0 through A5.
9. Where are the I2C pins located? The I2C protocol uses the SDA and SCL pins. On the Uno R3, these are located near the AREF pin at the top left.
10. Where are the SPI pins located? SPI communication utilizes the SCK, MISO, MOSI, and SS pins, which share functionality with digital pins D13, D12, D11, and D10 respectively.
11. Is there a built-in LED I can program? Yes, there is a built-in LED tied to digital pin 13 (PB5).
12. What are the TX and RX pins for? Pins 0 (RX) and 1 (TX) are used for hardware UART serial communication.
13. What is the clear plastic piece that comes with it? It is a protective plastic base or sled that prevents the sharp solder joints on the bottom of the board from scratching your desk.
14. Is this an authentic Arduino board? Yes, this is an official board, specifically designed and assembled in Italy, and arrives in the official Arduino packaging.
15. Does it have built-in Wi-Fi or Bluetooth? No, the standard Arduino Uno R3 does not have native wireless connectivity.
16. What is the silver oval component on the board? That is the crystal oscillator, which regulates the clock speed of the board.
17. What are the ICSP pins used for? The 2x3 header pins (ICSP) allow you to program the microcontroller directly using an external programmer.
18. What is the Vin pin used for? The Vin pin can be used to supply input voltage directly to the board's internal voltage regulator if you are not using USB or the barrel jack.
19. What does the button in the corner do? The tactile button located near the USB port is the Reset button, which restarts the code running on the microcontroller.
20. What is the IOREF pin for? The IOREF pin provides the voltage reference with which the microcontroller operates, allowing compatible shields to adapt to the board's logic level.

| Manufacturer | Generic |
|---|
Probots sells every Electronics Part for your next Project. You can order 10,000+ Electronic Parts Online - Arduino, Raspberry Pi, NodeMCU Development Boards, Sensors, Motors, Motor Drivers, SMPS, Plastic Enclosures etc in India directly on probots.co.in
We delivery electronics components and parts throughout India using standard couriers like Bluedart, Delhivery & India Post.
For order related queries contact -
This item is covered by a warranty of 7 days from the date of delivery, against confirmed manufacturing defects only, as verified by Probots' own testing and investigation. In case of a confirmed defect, we will replace the item — a refund is issued only if a replacement can't be supplied (e.g. discontinued or out of stock). Transit damage or a wrong item received must be reported within 3 days of delivery.
If the product shows signs of misuse, tampering, physical damage, static discharge, liquid or fire damage, use of unapproved chemicals, or has been soldered or physically altered in any way.
China
Probots sells every Electronics Part for your next Project. You can order 10,000+ Electronic Parts Online - Arduino, Raspberry Pi, NodeMCU Development Boards, Sensors, Motors, Motor Drivers, SMPS, Plastic Enclosures etc in India directly on probots.co.in
We offer specialized services for Bulk, Wholesale & B2B Customers like discounted prices, additional shipping options, customised products, etc . Customer with large quantity & regular orders qualify for the specialised discounted rates.
We also offer dedicated sales team to assist you with the order process by providing sales quotations, PI, technical support for choosing products, etc.
Note: Business Orders are processed manually and usually take 1-3 days to process compared to placing the order directly on our website. Please plan your purchases accordingly.
Need Help?
For bulk enquiries contact us by -

Probots Electronics is highly regarded for its highly skilled team and knowledgeable staff who provide expert guidance to ensure customers select the right components for their technical projects. The business maintains a strong reputation for prompt service and reliable support, with many clients praising their quick response times and genuine commitment to customer satisfaction.


A very great place for electronics Such a well maintained shop... Felt good shopping here


Nice

For new developments kit available and they will support till working, and I suggest this place strongly


This place has all the electronic parts students will ever need, staff is friendly and the place is organised.


It was a really nice experience! I was happy to find such a wide range of robotics kits for kids, suitable for different age groups and learning levels.

Excellent experience




Good stuff

Buyed them. But no bargain. Helpful staff.


Available all children school project spears parts like electronics


It was good experience




Staff is very patient and helpful

One of the best place for electronics you will get everything you want! With the best and orginal quality

Very helpful staff and the best place to buy components for projects

Wonderful store with expert service and technically strong people.

Prompt delivery, excellent technical support


Large inventory of electronic components and parts. Well trained service personnel and technicians who can quickly identify and rectify product defect if any. They are a reliable and trustworthy online stores.

A very great place for electronics Such a well maintained shop... Felt good shopping here
Nice
For new developments kit available and they will support till working, and I suggest this place strongly
This place has all the electronic parts students will ever need, staff is friendly and the place is organised.
It was a really nice experience! I was happy to find such a wide range of robotics kits for kids, suitable for different age groups and learning levels.
Excellent experience
Good stuff
Buyed them. But no bargain. Helpful staff.
Available all children school project spears parts like electronics
It was good experience
Staff is very patient and helpful
One of the best place for electronics you will get everything you want! With the best and orginal quality
Very helpful staff and the best place to buy components for projects
Wonderful store with expert service and technically strong people.
Prompt delivery, excellent technical support
Large inventory of electronic components and parts. Well trained service personnel and technicians who can quickly identify and rectify product defect if any. They are a reliable and trustworthy online stores.
● 20 min readVol. 56 | The Heavyweight DC Drivetrain Duel Reliability isn’t optional when you’re designing actuators that need to move actual steel or
Read Article → ● 13 min read
Workbench Vol. 49 🚀 The Project Trifecta: 3 Builds to Start Today We don’t just stock parts; we curate ecosystems. This week’s arrivals are desi
Read Article → ● 18 min read
Vol. 59 | The Battle of the Bite-Sized Boards Picture a project that needs full Linux, networking, and GPIO—but has almost no room for a conventional
Read Article →