
















 ● 20 min read
Showdown: RS550 12V DC 8000 vs RS-555 12V DC 6000 RPM DC Motor
Vol. 56 | The Heavyweight DC Drivetrain Duel Reliability isn’t optional when you’re designing actuators that need to move actual steel or
Read Article →
| Bulk Pricing | ||
|---|---|---|
| QTY | Unit Price(Inlc. GST) | |
| 25+ | ₹116.62 ₹ 98.83 + 17.79 GST | |
| 50+ | ₹115.43 ₹ 97.82 + 17.61 GST | |
| 75+ | ₹114.24 ₹ 96.81 + 17.43 GST | |
| 100+ | ₹111.86 ₹ 94.8 + 17.06 GST | |
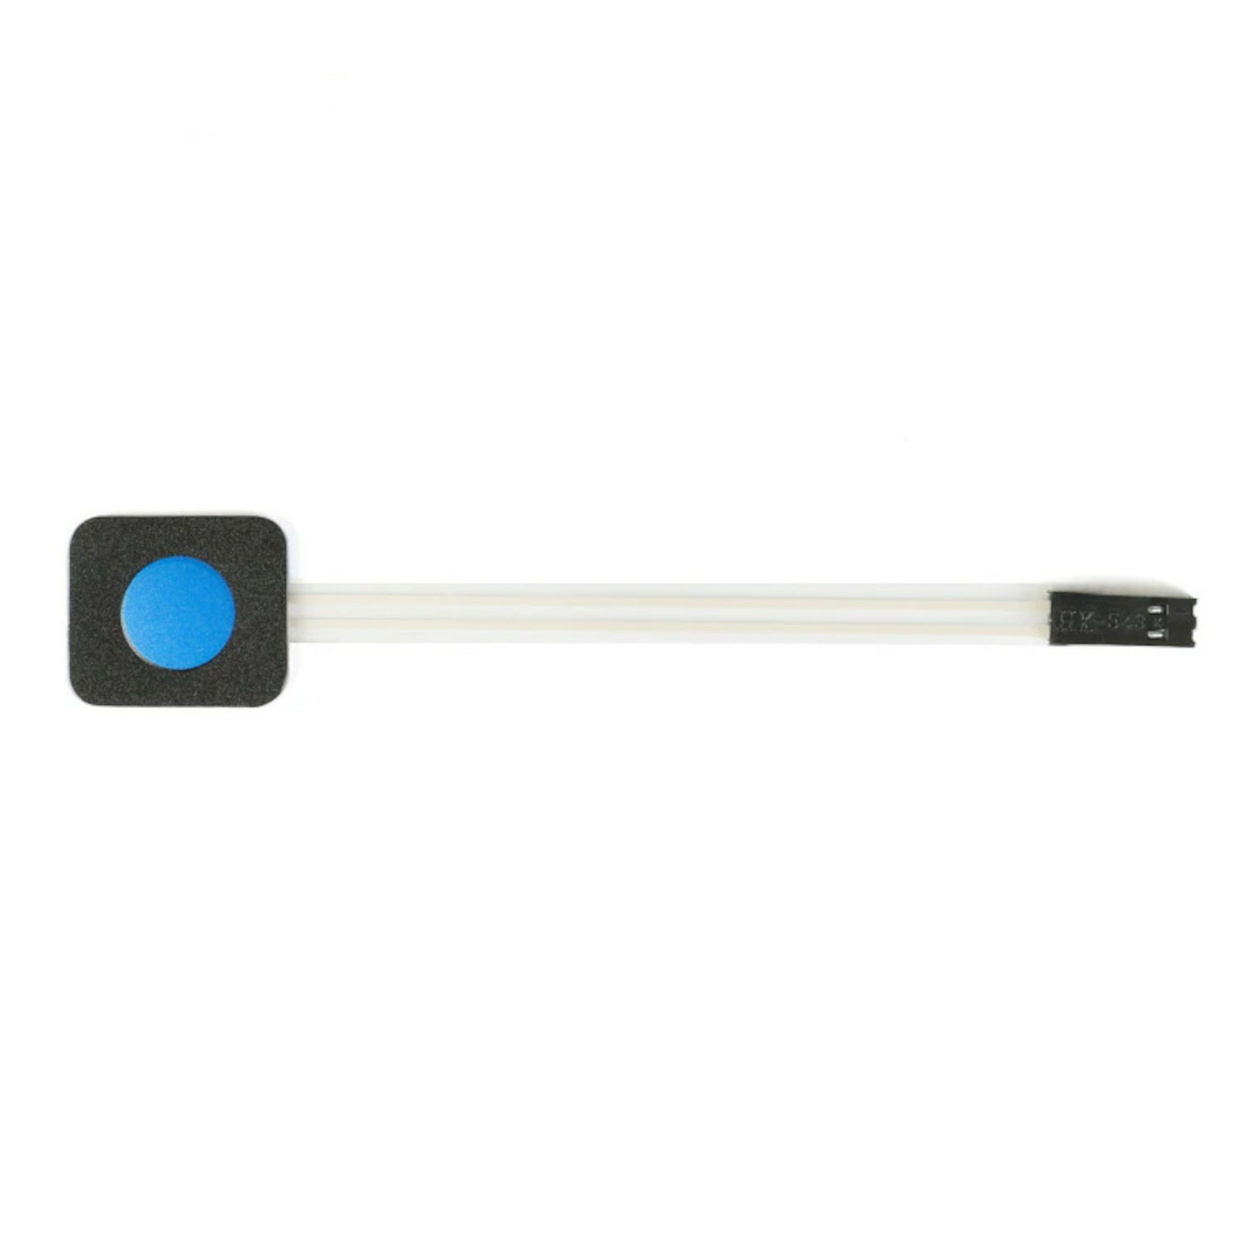
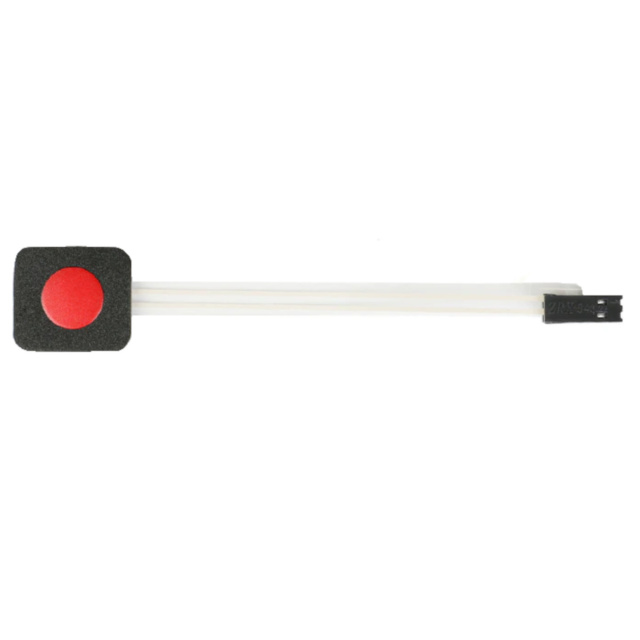
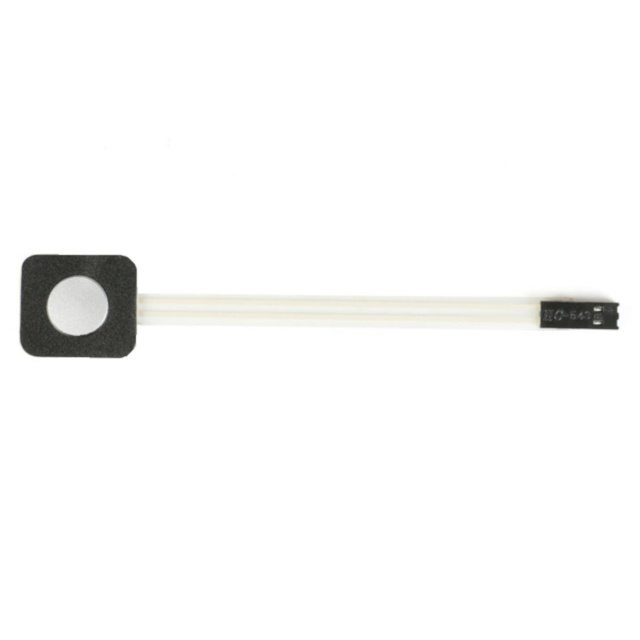
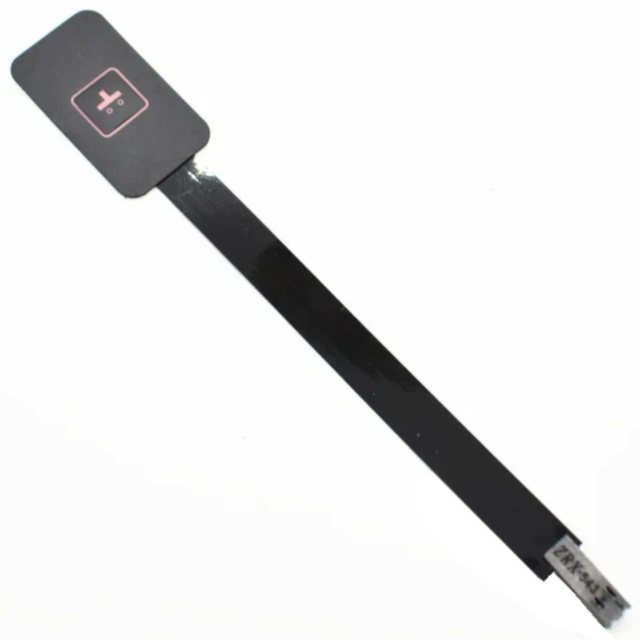
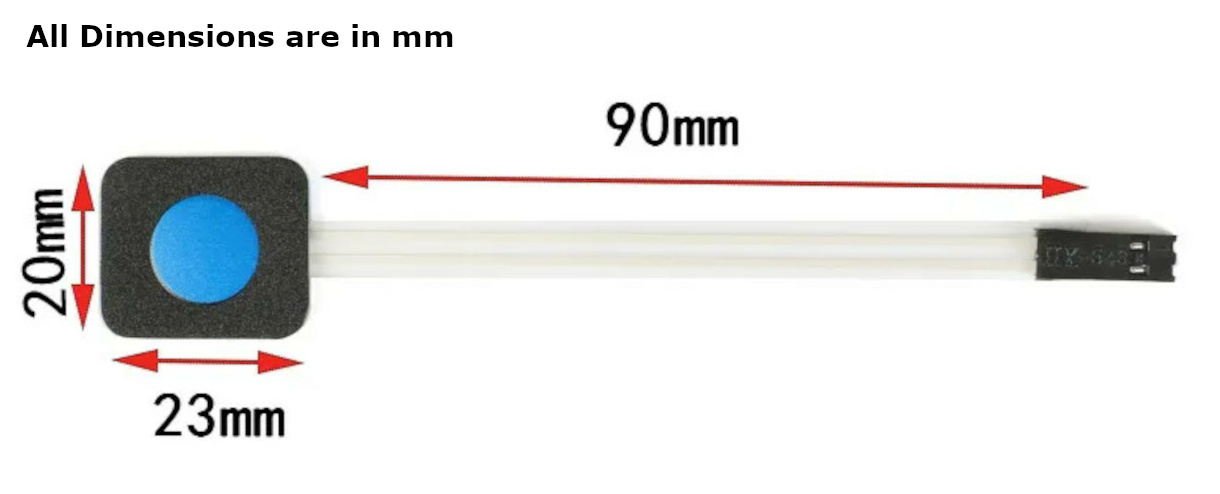
Add a sleek, low-profile input button to your custom electronics enclosures. This single-key membrane switch features a tactile blue button, a peel-and-stick adhesive backing, and a flexible 90mm ribbon cable ending in a standard 2.54mm female connector.
Ultra-Thin, Peel-and-Stick Mounting Designing a custom 3D-printed enclosure or acrylic case for your project is incredibly rewarding, but mounting traditional pushbuttons can be a hassle, requiring precise drilling and taking up valuable internal space. This Single Button Membrane Switch solves that problem. The actual button pad measures a compact 20mm by 23mm and is paper-thin. Simply peel off the protective white paper on the back to reveal a strong adhesive backing, allowing you to stick the button directly onto the outside of your project box in seconds.
Tactile Feedback & Simple Wiring Despite its flat appearance, the blue button features an embedded metal dome that provides a satisfying, tactile "click" when pressed, ensuring the user knows their input was registered. Wiring it up is just as simple. The switch features a 90mm flexible ribbon cable that terminates in a standard 2.54mm pitch female Dupont-style connector. This allows you to plug it directly into standard male header pins on an Arduino, a breadboard, or a custom PCB without any soldering required!
Standard Momentary Operation Internally, this operates as a standard "Normally Open" (NO) momentary switch. When the button is unpressed, the circuit is broken. When you press the blue dot, it temporarily bridges the two wires inside the ribbon cable, completing the circuit. It is perfectly designed for low-voltage (3.3V or 5V) logic signals.
Button Count: 1 (Single Key)
Pad Dimensions: 20mm x 23mm
Cable Length: 90mm
Connector Type: 2.54mm Pitch Female (Dupont Style)
Mounting Method: Self-Adhesive Backing
Switch Type: Momentary, Normally Open (NO)
Maximum Rating: Typically 35V DC, 100mA (Logic level only)
Custom Control Panels: Adding dedicated "Start," "Stop," or "Reset" buttons to the front faceplate of a DIY CNC machine or 3D printer enclosure.
Hidden Triggers: Using the flat profile and adhesive back to hide a trigger switch under a thin veneer of a desk for escape room props or interactive displays.
Wearable Electronics: Sticking the flexible pad onto a wristband or glove to act as an easy-to-reach trigger for a cosplay lighting setup.
Unlock New Capabilities (Project Evolution)
The "Zero-Component" Input Setup: Beginners often think they need to wire external 10K Ohm pull-up resistors to use a button with an Arduino, which clutters up the breadboard. Evolve your coding skills! You can wire this switch directly to the Arduino using just two wires (one to GND, one to a Digital Pin) and skip the resistor entirely. By simply initializing the pin in your code as pinMode(pin, INPUT_PULLUP), you activate the Arduino's internal, invisible resistors. You get perfectly clean, debounce-ready button presses with zero extra hardware!
1 x 1 Blue Button Flexible Membrane Switch Keypad (with attached 90mm cable)
Is this a toggle switch or a momentary switch? This is a momentary switch. It only connects the circuit for exactly as long as your finger is physically pressing the blue button down.
Does it make a clicking sound? Yes, it has a built-in metal dome that provides a soft but distinct tactile "click" feeling and sound when pressed.
How do I mount it? The back of the square pad has a white peel-off paper. Once removed, it reveals a strong adhesive layer that sticks to metal, plastic, glass, and smooth wood.
What are the dimensions of the sticky pad? The rectangular pad measures 20mm tall by 23mm wide.
How long is the cable? The flexible ribbon cable extends 90mm (roughly 3.5 inches) from the edge of the pad to the connector.
Can I cut the ribbon cable to make it shorter? No. The ribbon cable contains conductive silver traces printed on the plastic. If you cut it, you will destroy the traces and ruin the switch.
What kind of connector is on the end? It ends in a black plastic female connector with a standard 2.54mm (0.1 inch) pitch. It perfectly slides over standard square male header pins.
How many wires does it use? While the black connector might look like it can hold 2 or 3 pins, the actual switch only uses two electrical connections (in and out) to close the circuit.
Do I need a pull-up or pull-down resistor to use this with a microcontroller? Yes, like any mechanical switch, you need a resistor to prevent a "floating" pin. However, you can simply use the built-in internal pull-up resistors on your Arduino or ESP32 via code (INPUT_PULLUP).
Does the button light up? No. The blue circle is just printed coloring. There are no LEDs inside this membrane.
Can this switch handle 110V or 220V AC wall power? Absolutely NOT. This is strictly a low-voltage logic switch. It is designed to handle a maximum of around 12V to 35V DC at extremely low currents (under 100mA). Running wall power through it will cause it to melt and catch fire instantly.
Is the switch waterproof? The front plastic face is water-resistant and can easily be wiped clean with a damp cloth. However, the adhesive back, the edges, and the ribbon connector are not waterproof. Do not submerge it.
Can I stick it to a curved surface? It can handle very gentle, sweeping curves (like a large PVC pipe). Do not attempt to fold it over a sharp 90-degree corner, or you will snap the internal conductive traces.
Will this work with a Raspberry Pi? Yes, it works perfectly with the 3.3V GPIO pins on any Raspberry Pi model.
Which wire is positive and which is negative? It does not matter. This is a simple, unpolarized mechanical switch. It just bridges the two wires together when pressed, so you can plug it in either way.
How do I connect it if my board only has female headers? You will need to use a male-to-male Dupont jumper wire. Plug one end into the switch's female connector, and the other end into your board.
Can I use this as a power button to turn my battery pack on and off? No, because it is a momentary switch (not a latching on/off toggle), and because it cannot handle high current. It can only be used as a signal input to tell a microcontroller to turn something else on.
Probots sells every Electronics Part for your next Project. You can order 10,000+ Electronic Parts Online - Arduino, Raspberry Pi, NodeMCU Development Boards, Sensors, Motors, Motor Drivers, SMPS, Plastic Enclosures etc in India directly on probots.co.in
We delivery electronics components and parts throughout India using standard couriers like Bluedart, Delhivery & India Post.
For order related queries contact -
This item is covered by a warranty of 7 days from the date of delivery, against confirmed manufacturing defects only, as verified by Probots' own testing and investigation. In case of a confirmed defect, we will replace the item — a refund is issued only if a replacement can't be supplied (e.g. discontinued or out of stock). Transit damage or a wrong item received must be reported within 3 days of delivery.
If the product shows signs of misuse, tampering, physical damage, static discharge, liquid or fire damage, use of unapproved chemicals, or has been soldered or physically altered in any way.
China
Probots sells every Electronics Part for your next Project. You can order 10,000+ Electronic Parts Online - Arduino, Raspberry Pi, NodeMCU Development Boards, Sensors, Motors, Motor Drivers, SMPS, Plastic Enclosures etc in India directly on probots.co.in
We offer specialized services for Bulk, Wholesale & B2B Customers like discounted prices, additional shipping options, customised products, etc . Customer with large quantity & regular orders qualify for the specialised discounted rates.
We also offer dedicated sales team to assist you with the order process by providing sales quotations, PI, technical support for choosing products, etc.
Note: Business Orders are processed manually and usually take 1-3 days to process compared to placing the order directly on our website. Please plan your purchases accordingly.
Need Help?
For bulk enquiries contact us by -
Probots Electronics is highly regarded for its highly skilled team and knowledgeable staff who provide expert guidance to ensure customers select the right components for their technical projects. The business maintains a strong reputation for prompt service and reliable support, with many clients praising their quick response times and genuine commitment to customer satisfaction.


A very great place for electronics Such a well maintained shop... Felt good shopping here


Nice

For new developments kit available and they will support till working, and I suggest this place strongly


This place has all the electronic parts students will ever need, staff is friendly and the place is organised.


It was a really nice experience! I was happy to find such a wide range of robotics kits for kids, suitable for different age groups and learning levels.

Excellent experience




Good stuff

Buyed them. But no bargain. Helpful staff.


Available all children school project spears parts like electronics


It was good experience




Staff is very patient and helpful

One of the best place for electronics you will get everything you want! With the best and orginal quality

Very helpful staff and the best place to buy components for projects

Wonderful store with expert service and technically strong people.

Prompt delivery, excellent technical support


Large inventory of electronic components and parts. Well trained service personnel and technicians who can quickly identify and rectify product defect if any. They are a reliable and trustworthy online stores.

A very great place for electronics Such a well maintained shop... Felt good shopping here
Nice
For new developments kit available and they will support till working, and I suggest this place strongly
This place has all the electronic parts students will ever need, staff is friendly and the place is organised.
It was a really nice experience! I was happy to find such a wide range of robotics kits for kids, suitable for different age groups and learning levels.
Excellent experience
Good stuff
Buyed them. But no bargain. Helpful staff.
Available all children school project spears parts like electronics
It was good experience
Staff is very patient and helpful
One of the best place for electronics you will get everything you want! With the best and orginal quality
Very helpful staff and the best place to buy components for projects
Wonderful store with expert service and technically strong people.
Prompt delivery, excellent technical support
Large inventory of electronic components and parts. Well trained service personnel and technicians who can quickly identify and rectify product defect if any. They are a reliable and trustworthy online stores.
● 20 min readVol. 56 | The Heavyweight DC Drivetrain Duel Reliability isn’t optional when you’re designing actuators that need to move actual steel or
Read Article → ● 13 min read
Workbench Vol. 49 🚀 The Project Trifecta: 3 Builds to Start Today We don’t just stock parts; we curate ecosystems. This week’s arrivals are desi
Read Article →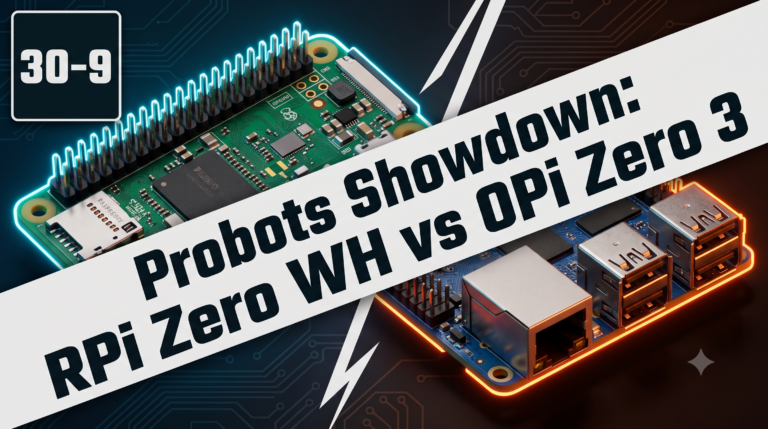 ● 18 min read
Vol. 59 | The Battle of the Bite-Sized Boards Picture a project that needs full Linux, networking, and GPIO—but has almost no room for a conventional
Read Article →