














 ● 20 min read
Showdown: RS550 12V DC 8000 vs RS-555 12V DC 6000 RPM DC Motor
Vol. 56 | The Heavyweight DC Drivetrain Duel Reliability isn’t optional when you’re designing actuators that need to move actual steel or
Read Article →
| Bulk Pricing | ||
|---|---|---|
| QTY | Unit Price(Inlc. GST) | |
| 5+ | ₹1,273.02 ₹ 1078.83 + 194.19 GST | |
| 10+ | ₹1,247.04 ₹ 1056.81 + 190.23 GST | |
| 20+ | ₹1,221.06 ₹ 1034.8 + 186.26 GST | |
| 50+ | ₹1,195.08 ₹ 1012.78 + 182.3 GST | |
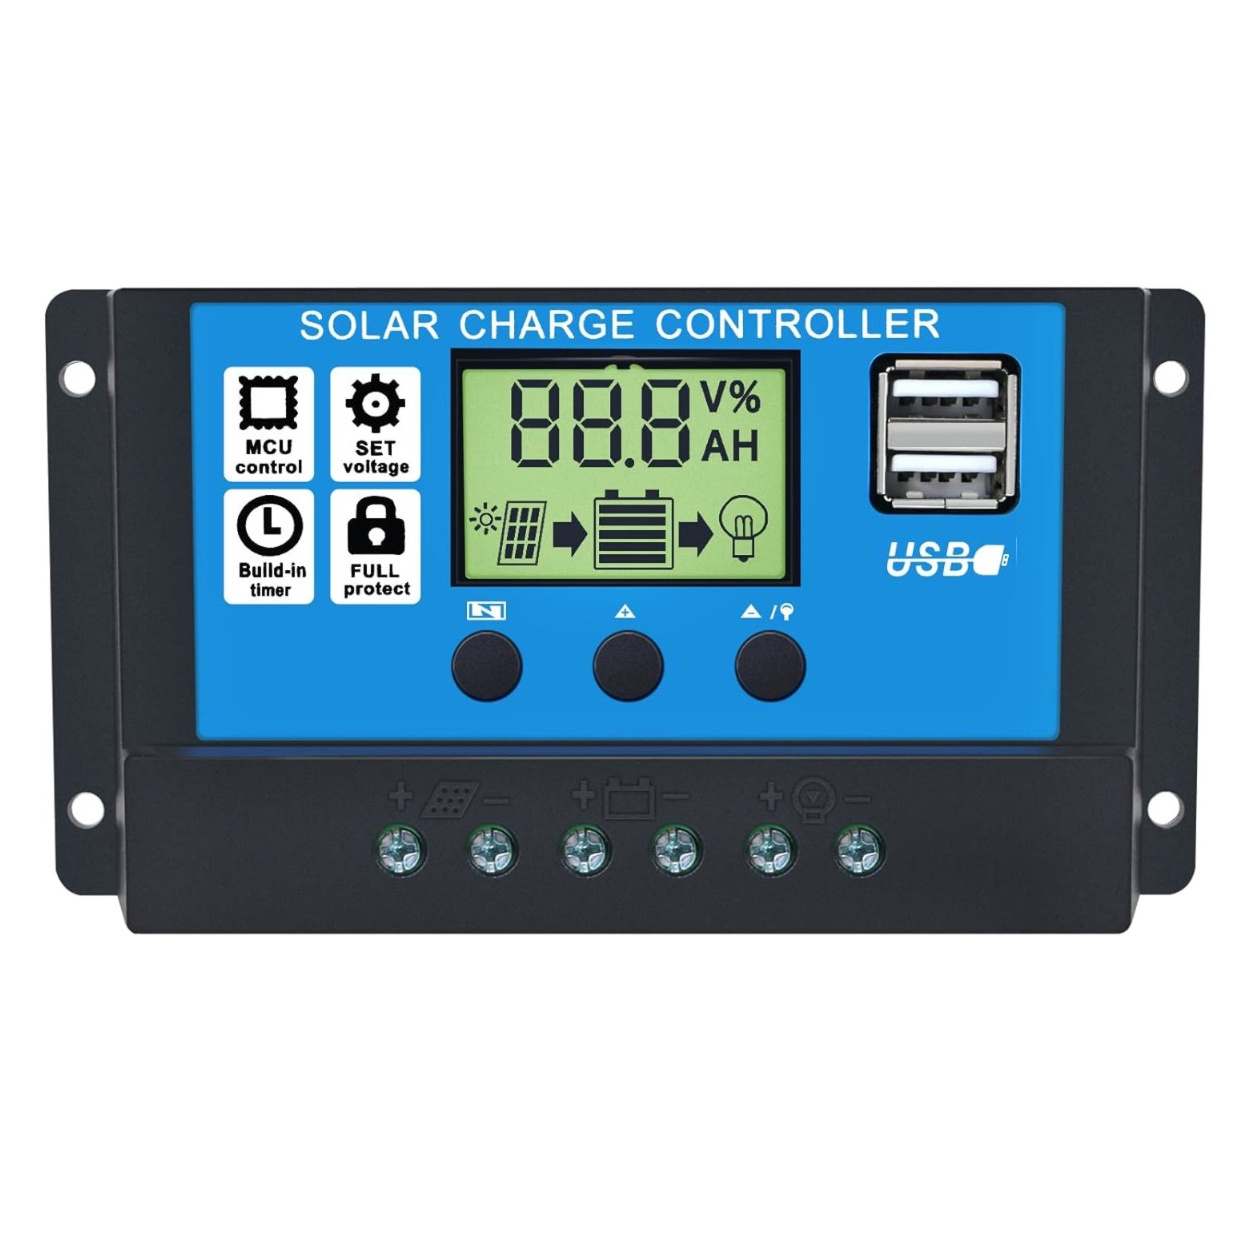
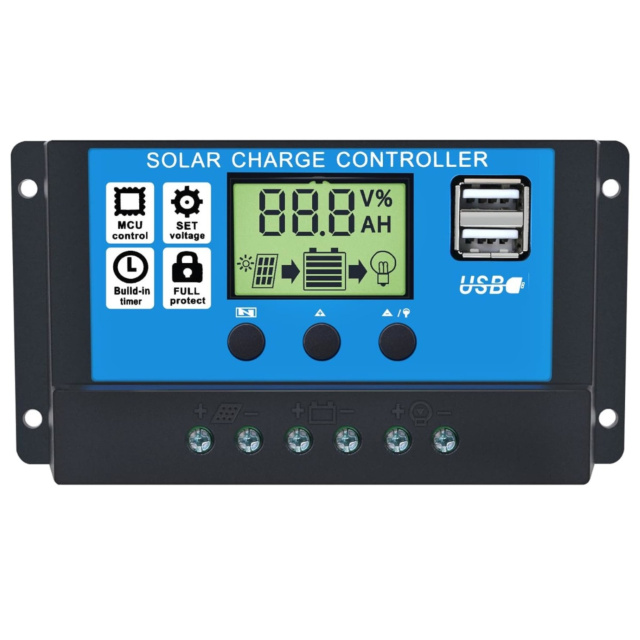
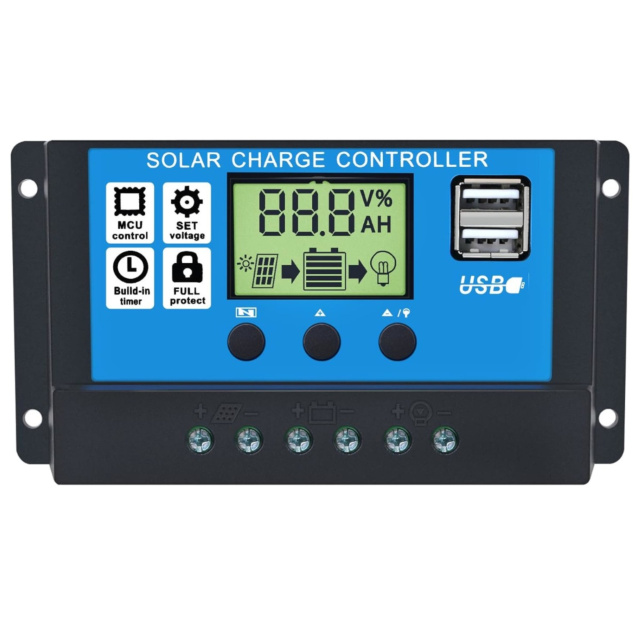
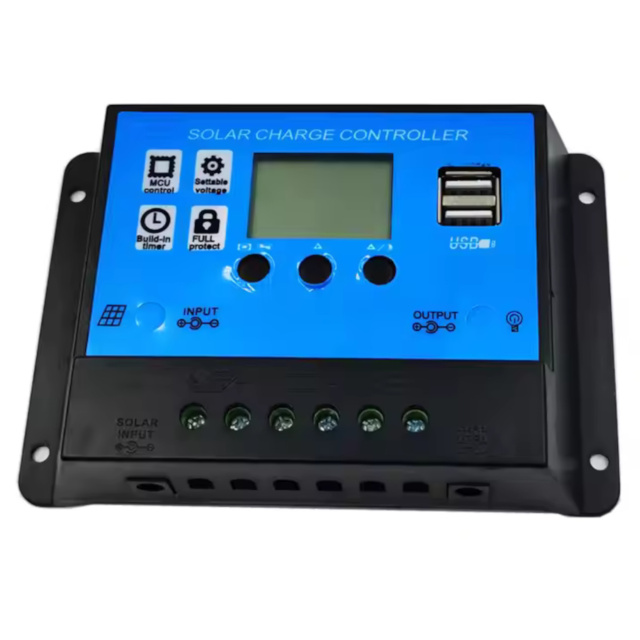
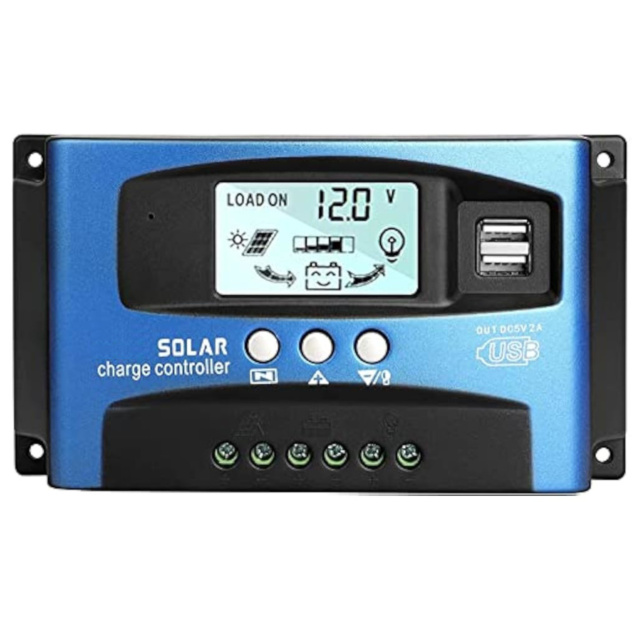
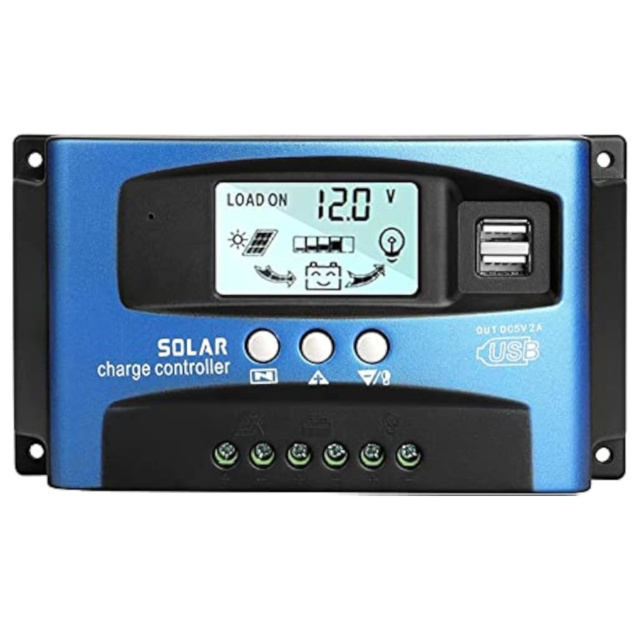
Safely manage your off-grid solar system! This intelligent PWM charge controller automatically detects 12V or 24V battery banks, features a highly readable LCD screen, built-in system protections, and dual USB ports for directly charging phones and tablets.
Intelligent PWM Charging Directly connecting a solar panel to a battery is dangerous, as the panel's wildly fluctuating voltage can quickly boil and destroy the battery chemistry. This controller utilizes PWM (Pulse Width Modulation) technology to intelligently regulate the energy. As the battery approaches full capacity, the controller slowly reduces the charging current, keeping the battery safely "floated" at 100% without overcharging. It automatically detects whether you have connected a 12V or 24V battery system and adjusts its charging parameters accordingly.
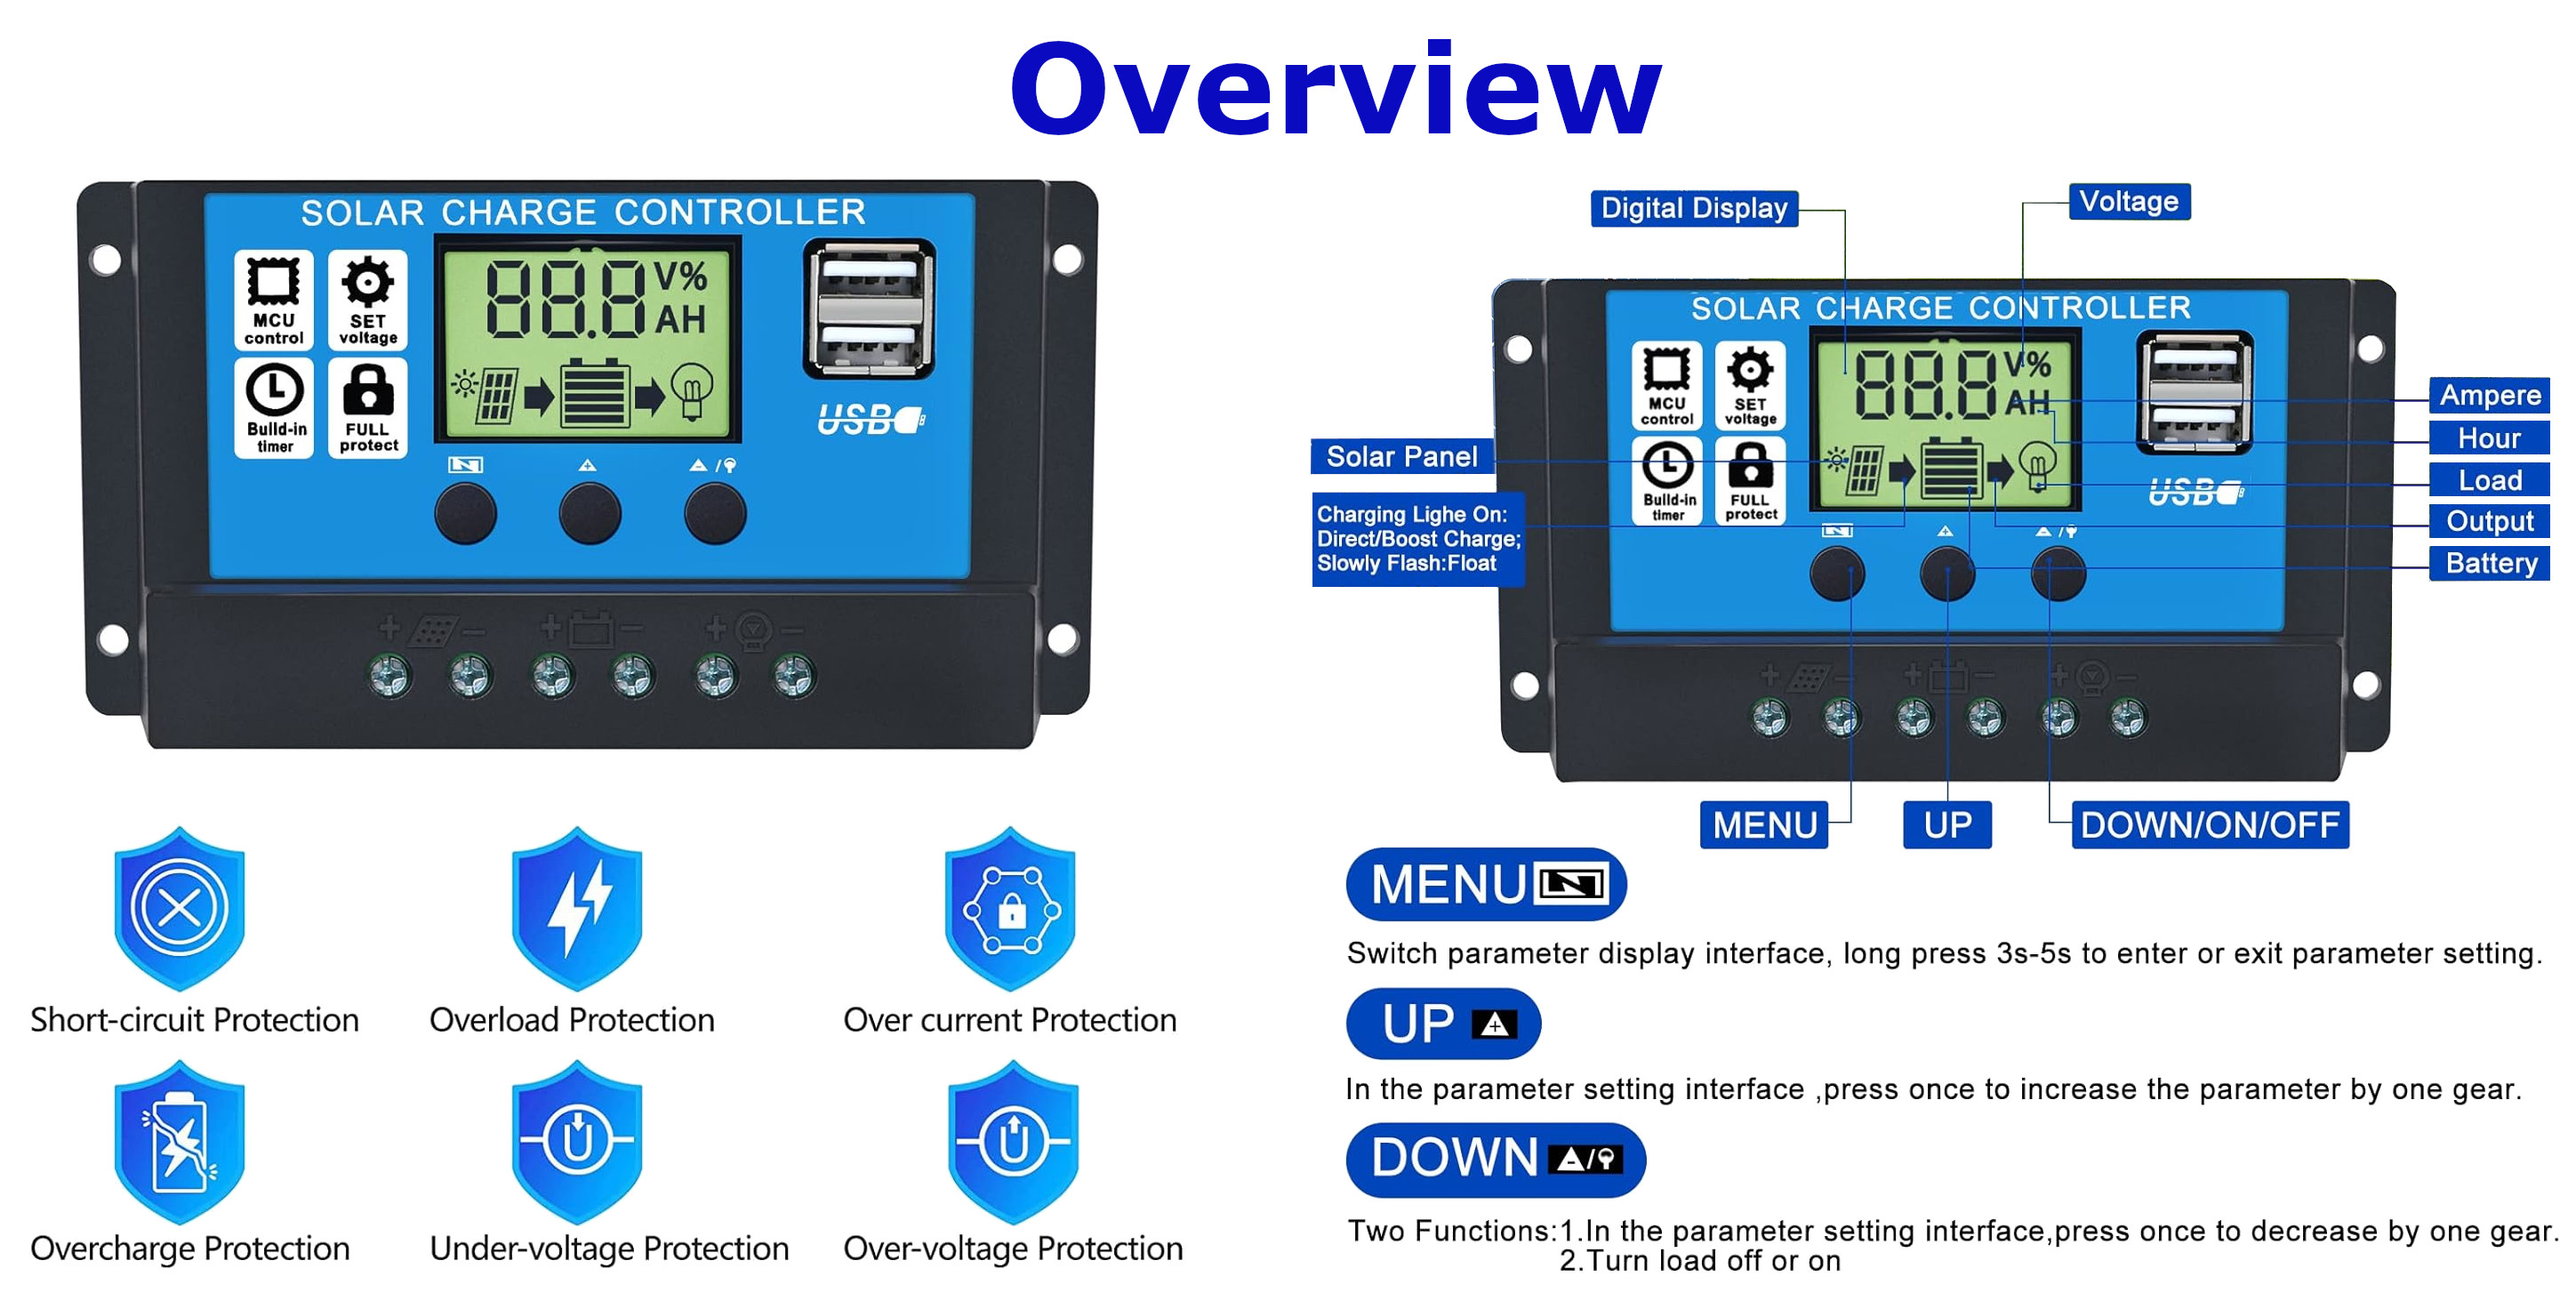
Informative LCD & Dual USB Outputs Gone are the days of guessing your battery levels with blinking LEDs. The large digital LCD screen provides real-time feedback on your system's status, displaying the current battery voltage, charging status, and load status. Additionally, the front panel features Dual 5V USB ports. This allows you to plug your smartphones, tablets, or rechargeable camping lights directly into the solar controller without needing a separate power inverter!
Comprehensive System Protection Off-grid environments can be unpredictable, but this controller is built to handle faults safely. It features a complete suite of electronic protections:
Overcharge / Over-voltage Protection: Prevents the battery from taking in too much power.
Under-voltage / Over-discharge Protection: Automatically cuts power to the "Load" terminals if the battery drops too low, preventing permanent battery damage.
Short-circuit & Overload Protection: Safely shuts down if your wired accessories draw too much current.
Reverse Polarity Protection: Protects the board if you accidentally swap the positive and negative cables.
CRITICAL: The Golden Rule of Solar Wiring To prevent destroying the controller's logic board, you must always follow the strict wiring sequence:
FIRST: Connect the Battery to the controller. (This allows the brain to wake up and detect if it is a 12V or 24V system).
SECOND: Connect the Solar Panels.
THIRD: Connect your 12V DC accessories to the Load terminals (Optional). (When disassembling the system, do it in the exact reverse order: Load, then Solar, then Battery).
Note:
⚡ Selection Guide:
Solar Panel Limit (12V System): Max 1000W - 1200W
Solar Panel Limit (24V System): Max 2000W - 2400W
Battery Compatibility: Lead Acid, AGM, Gel, and LiFePO4 (User Defined Mode)
System Voltage: 12V / 24V (Auto-detect)
Rated Charge Current: 100A (Max nominal peak)
Rated Discharge Current: 10A - 30A (Depending on specific model sub-variant)
Max Solar Input Voltage: < 50V (for 24V battery), < 25V (for 12V battery)
USB Output: 2x USB 5V / 2A (Max total)
Standby Current: < 10mA
Operating Temperature: -35°C to +60°C
Dimensions: 135mm x 70mm x 35mm
Mounting Hole Spacing: 126mm x 50mm
RV & Van Conversions: Managing the roof-mounted solar panels to keep your deep-cycle house batteries topped up while you live on the road.
Off-Grid Shed Lighting: Powering 12V LED strips inside a remote garden shed. The controller's load terminal can even be programmed as a timer to turn the lights on automatically when the sun goes down!
DIY Solar Generators: Building a custom power-box inside a rugged cooler, utilizing the dual USB ports to charge drone batteries and phones during camping trips.
???? Unlock New Capabilities (Project Evolution)
The Automated Smart Garden: Don't just run lights—run a farm! Evolve your project by utilizing the "Load" terminals on this controller. Connect a 12V water pump and a 12V programmable timer relay to the load output. Wire the controller to a 50W solar panel and a standard 12V car battery. You have now created a 100% off-grid, self-sustaining irrigation system that will automatically water your remote garden beds every single day without you ever having to run an extension cord!
Downloads:
Package Includes:

What is the absolute correct order to wire this controller? CRITICAL: 1) Connect the Battery first. 2) Connect the Solar Panel second. 3) Connect the DC Load third.
Why do I have to connect the battery first? The controller needs the battery power to wake up its microprocessor and auto-detect whether it is regulating a 12V or 24V system. Connecting the solar panel first can send unregulated high voltage into the dead brain and fry the controller.
What types of batteries are compatible? These PWM controllers are primarily designed for standard 12V/24V Lead-Acid batteries (OPEN, AGM, GEL).
Can I use this with Lithium (LiFePO4) batteries? You should check the manual's specific "b01/b02/b03" battery type settings. While some generic PWMs have a lithium setting, standard lead-acid profiles will not charge LiFePO4 batteries correctly and may trigger their internal BMS.
What does "100A" mean on the label? It denotes the maximum peak charging current rating of the product line. Note for DIYers: A compact controller of this physical size cannot sustain 100 Amps of continuous current without overheating. It is highly recommended to keep continuous solar input to a fraction of this rating (e.g., 20A-30A max) for safe, long-term reliability.
Can I connect an AC Power Inverter to the "Load" terminals? ABSOLUTELY NOT. Power inverters draw massive surges of current that will instantly melt the controller's load circuit. Inverters must always be wired directly to the battery terminals with heavy-gauge wire and an inline fuse.
What are the "Load" terminals actually for then? The right-most screw terminals (with the lightbulb icon) are for low-draw 12V DC accessories, like 12V LED light strips, small 12V DC fans, or 12V Wi-Fi routers.
Can I charge my iPhone with this? Yes! The front panel features two USB ports that output a standard 5V, perfect for charging phones, power banks, and tablets.
What do the three buttons do? The left button (MENU) cycles through the display screens (Voltage, Timer, Battery Type). The middle and right buttons (UP/DOWN) change values in the settings menu and can manually turn the "Load" output on or off.
How do I turn the Load terminals on and off manually? On the main home screen, simply press the right-most button (Down/Arrow) once to toggle the load power on or off.
Can this controller turn my lights on automatically at night? Yes! The "Load" output has a timer setting. You can set it to turn on automatically when the solar panel stops producing voltage (dusk) and run for a specific number of hours.
What is the maximum solar panel voltage I can connect? If you have a 12V battery, the maximum solar panel input voltage (Voc) should be under 25V. If you have a 24V battery, the maximum solar input should be under 50V.
Can I use a 24V solar panel to charge a 12V battery with this? No. Because this is a PWM controller (not MPPT), the solar panel's nominal voltage must match the battery's nominal voltage. Use a 12V panel for a 12V battery, and a 24V panel for a 24V battery.
Is this controller waterproof? No. It is designed for indoor use or to be mounted inside a weather-proof enclosure. Do not expose it to rain or extreme humidity.
What size wire should I use? The screw terminals generally accept up to 10 AWG or 8 AWG wire. Always size your wire based on the actual amperage your solar panels are generating.
Why is the screen showing a flashing battery icon? A flashing battery frame usually indicates the battery is fully charged and the controller has entered "Float" charging mode to maintain the voltage.
Why did my Load output turn off by itself? The controller has Low Voltage Disconnect (LVD). If your battery voltage drops too low (usually around 10.7V), it shuts off the load terminals to prevent destroying your battery. It will turn back on when the battery recharges.
Can I connect two of these controllers to one battery bank? Yes, you can have multiple separate solar arrays, each with their own controller, feeding into a single large battery bank. They will read the voltage and work independently.
What are the physical dimensions? The controller measures 135mm long, 70mm tall, and roughly 35mm thick.
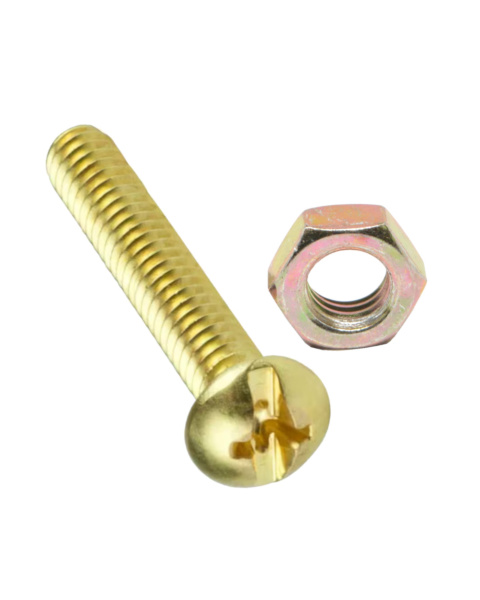
How do I mount it? The black plastic backplate has four pre-drilled mounting holes in the corners. The spacing between the holes is 126mm horizontally and 50mm vertically. Simply use four wood or machine screws to secure it to a flat surface.
| Technical Details |
|
|---|
Probots sells every Electronics Part for your next Project. You can order 10,000+ Electronic Parts Online - Arduino, Raspberry Pi, NodeMCU Development Boards, Sensors, Motors, Motor Drivers, SMPS, Plastic Enclosures etc in India directly on probots.co.in
We delivery electronics components and parts throughout India using standard couriers like Bluedart, Delhivery & India Post.
For order related queries contact -
This item is covered by a warranty of 7 days from the date of delivery, against confirmed manufacturing defects only, as verified by Probots' own testing and investigation. In case of a confirmed defect, we will replace the item — a refund is issued only if a replacement can't be supplied (e.g. discontinued or out of stock). Transit damage or a wrong item received must be reported within 3 days of delivery.
If the product shows signs of misuse, tampering, physical damage, static discharge, liquid or fire damage, use of unapproved chemicals, or has been soldered or physically altered in any way.
China
Probots sells every Electronics Part for your next Project. You can order 10,000+ Electronic Parts Online - Arduino, Raspberry Pi, NodeMCU Development Boards, Sensors, Motors, Motor Drivers, SMPS, Plastic Enclosures etc in India directly on probots.co.in
We offer specialized services for Bulk, Wholesale & B2B Customers like discounted prices, additional shipping options, customised products, etc . Customer with large quantity & regular orders qualify for the specialised discounted rates.
We also offer dedicated sales team to assist you with the order process by providing sales quotations, PI, technical support for choosing products, etc.
Note: Business Orders are processed manually and usually take 1-3 days to process compared to placing the order directly on our website. Please plan your purchases accordingly.
Need Help?
For bulk enquiries contact us by -

Probots Electronics is highly regarded for its highly skilled team and knowledgeable staff who provide expert guidance to ensure customers select the right components for their technical projects. The business maintains a strong reputation for prompt service and reliable support, with many clients praising their quick response times and genuine commitment to customer satisfaction.


A very great place for electronics Such a well maintained shop... Felt good shopping here


Nice

For new developments kit available and they will support till working, and I suggest this place strongly


This place has all the electronic parts students will ever need, staff is friendly and the place is organised.


It was a really nice experience! I was happy to find such a wide range of robotics kits for kids, suitable for different age groups and learning levels.

Excellent experience




Good stuff

Buyed them. But no bargain. Helpful staff.


Available all children school project spears parts like electronics


It was good experience




Staff is very patient and helpful

One of the best place for electronics you will get everything you want! With the best and orginal quality

Very helpful staff and the best place to buy components for projects

Wonderful store with expert service and technically strong people.

Prompt delivery, excellent technical support


Large inventory of electronic components and parts. Well trained service personnel and technicians who can quickly identify and rectify product defect if any. They are a reliable and trustworthy online stores.

A very great place for electronics Such a well maintained shop... Felt good shopping here
Nice
For new developments kit available and they will support till working, and I suggest this place strongly
This place has all the electronic parts students will ever need, staff is friendly and the place is organised.
It was a really nice experience! I was happy to find such a wide range of robotics kits for kids, suitable for different age groups and learning levels.
Excellent experience
Good stuff
Buyed them. But no bargain. Helpful staff.
Available all children school project spears parts like electronics
It was good experience
Staff is very patient and helpful
One of the best place for electronics you will get everything you want! With the best and orginal quality
Very helpful staff and the best place to buy components for projects
Wonderful store with expert service and technically strong people.
Prompt delivery, excellent technical support
Large inventory of electronic components and parts. Well trained service personnel and technicians who can quickly identify and rectify product defect if any. They are a reliable and trustworthy online stores.
● 20 min readVol. 56 | The Heavyweight DC Drivetrain Duel Reliability isn’t optional when you’re designing actuators that need to move actual steel or
Read Article → ● 13 min read
Workbench Vol. 49 🚀 The Project Trifecta: 3 Builds to Start Today We don’t just stock parts; we curate ecosystems. This week’s arrivals are desi
Read Article → ● 18 min read
Vol. 59 | The Battle of the Bite-Sized Boards Picture a project that needs full Linux, networking, and GPIO—but has almost no room for a conventional
Read Article →